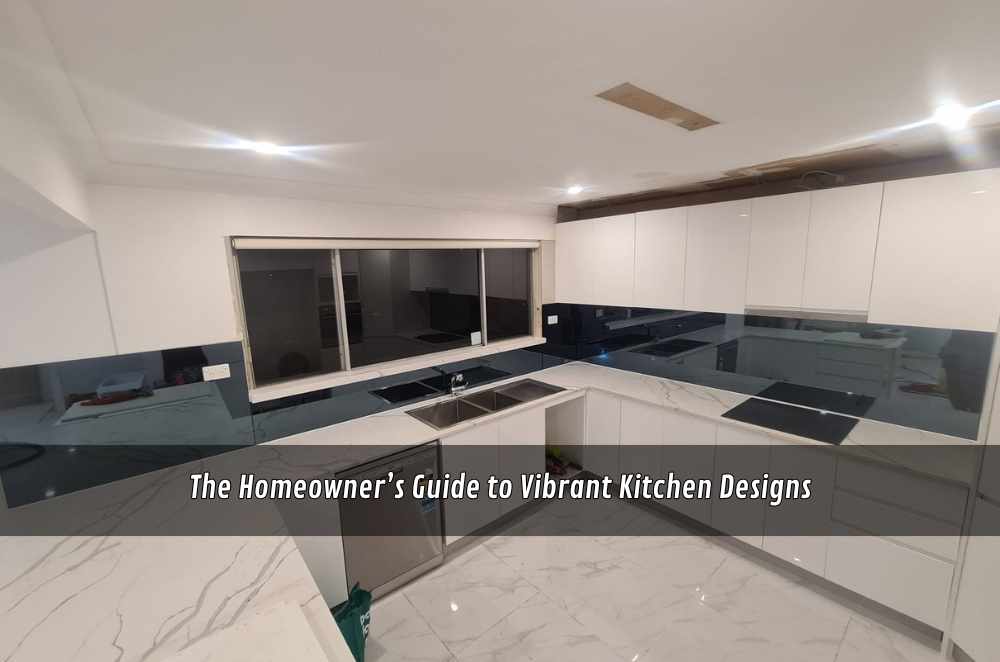
Kitchens do double duty in Aussie homes — weekday workhorses, weekend hangouts. If you want a bold, easy-care feature that survives splashes and heat, glass is hard to beat. It reflects light, wipes clean, and carries colour like nothing else. And when you want a tailored look — cut-outs for power points, laser-clean edges, perfect colour matching — consider custom glass splashbacks so the finish suits your space, not the other way round.
Understand your space and how you cook
Before you fall for a colour swatch, map the way your kitchen actually works.
Heat zones: Where do your hottest pots live? What’s directly behind the cooktop?
Splash zones: Pasta night? Stir-fries? A taller panel behind the burner line saves scrubbing.
Light paths: Morning sun from the east, task lighting from the underside of wall cabinets, and any window reflections that might bounce glare into your eyes.
Outlets and switches: Plan cut-outs now; moving them later costs more than the glass.
First-hand note: I once tried to stretch a standard panel across a wall that wasn’t square. Looked fine on the tape measure, but the corner reveal told on me after install. A templated, custom piece would’ve saved the headache — and the re-order.
Colour choices that stay vibrant (and resale-friendly)
Glass turns colour up to eleven. That’s the gift — and the risk. A few ways to land the look you’ll love two years from now:
Borrow from permanent finishes: Pick a tone already living in your benchtop veining, floor boards, or cabinet grain.
Test at scale: Paint a sample board and hold it where the glass will sit; LEDs and daylight can shift the tone.
Satin vs high-gloss: High-gloss amplifies light and reads “glass”; satin softens reflections and fingerprints.
Metallics and pearlescents: Gorgeous under downlights; trial them against your hardware finish first.
If you’re still weighing options, a colour-planning explainer on kitchen glass splashback is a neat companion read.
And if you’re toying with mirrors instead of painted glass, sanity-check your thinking with mirror splashbacks pros and cons — great for bouncing light in small kitchens, but they show steam and streaks sooner.
Heat, safety and what to place behind the cooktop
Glass belongs behind burners — if you respect clearances and the right glass type. Toughened (tempered) glass is the norm; it’s heat-treated to withstand the thermal swings you’ll see in a real kitchen.
Mind the clearances: Leave sufficient space between open flames and any surface. For government guidance that helps you make safe choices near burners, see the glass splashback behind the gas cooktop.
Edges and cut-outs: Request polished edges and generous corner radii around power-point cut-outs; tight corners concentrate stress.
Behind gas vs induction: Induction runs cooler around the glass; gas throws lateral heat and needs more defensible space.
Don’t mix safety glass types: A single panel should be consistently toughened; laminated behind high heat isn’t typical unless specified for other reasons.
Lived example: A friend’s rental had a painted plasterboard splashback too close to a freestanding cooker. After one enthusiastic curry night, the paint browned. When they replaced it with a toughened panel set off the wall and added a deeper trivet, the worry disappeared — and the wall stayed pristine.
Details that make a splashback look custom
The difference between “installed” and “integrated” lies in the small stuff.
Seams and joins: Aim for full-length panels where you can. If joins are unavoidable, align them with cabinet breaks so they disappear.
Outlets and switches: Place them on the same horizontal line, use matching faceplates, and keep them clear of the heavy splash zone behind the wok burner.
Edges and returns: A short return (100–150 mm) at a window reveal or cabinet end makes the room feel finished.
Reflections: High-gloss glass can mirror your benchtop. If that reflection shows the underside of wall cabinets, consider a satin finish or a slim LED strip to “fill” the reflection with light.
Measuring tips you (and your installer) will thank yourself for
Mark the true centre of the cooktop and range hood; symmetry matters on glossy surfaces.
Record distances from fixed points (window trims, cabinet ends), not just from one corner.
Note wall bows or out-of-square corners; custom glass is cut to fit reality, not the ideal plan.
Confirm the benchtop is final-installed and sealed before templating glass.
Cleaning, care and long-term maintenance
The dream with glass is the quick wipe — keep that dream alive with the right routine.
Daily: Microfibre plus warm soapy water or glass cleaner. Wipe left-to-right, then top-to-bottom to catch streaks.
Weekly: Degrease lightly behind the hottest burner; avoid abrasive pads that scuff the surface.
Quarterly: Refresh a hydrophobic coating if you’ve used one; it helps steam and splatters release faster.
Caulks and seals: Check the silicone bead where glass meets benchtop; if it discolours or gaps, re-seal before moisture sneaks behind.
Scratch prevention
Keep metal utensil holders and knife blocks off the glass edge line; tiny knocks add up.
Wipe grit before it bakes on — dried sugar syrup is sneakily abrasive.
Don’t hook heavy utensils on the glass edge; use a rail or wall rack screwed to studs.
When something chips or cracks
Small edge chips away from heat can sometimes be dressed or hidden with silicone; structure matters more than cosmetics.
Any crack, star or bullseye in the field of the glass? Take a photo, stop using the hottest burner, and call your installer. Safety glass is tough — but it’s designed to fail safe, not keep soldiering on.
Quick design playbook (print this, stick it in the drawer)
Choose finish: High-gloss for sparkle, satin for a softer, modern look.
Lock colour: Test a painted sample in morning and night light; confirm against benchtop and handles.
Plan the hot zone: Check clearances behind the cooktop and confirm toughened glass. If unsure, review the glass splashback behind the gas cooktop.
Template properly: Book templating after benchtops are in and appliances are on-site.
Finish the edges: Decide on returns, outlet positions, and a silicone colour that matches the benchtop or grout.
Budgeting without the blowout
Glass pricing moves with size, cut-outs, edge work and access. A few ways to keep costs sensible:
Keep panels continuous where practical; each join adds labour.
Batch cut-outs at once; a late add-on can mean a whole new panel.
Simplify outlet placement to reduce complex notches.
Agree on colour up front with a labelled sample — colour changes after tempering aren’t a thing.
If you’re comparing quotes and timelines, reach out to a specialist who templates and installs daily; they’ll balance aesthetics, heat safety and cleaning reality better than a generic “one-size panel”.
Bringing it together
A vibrant kitchen starts with honest thinking about how you cook, then layers in colour, light, and the right materials. Glass splashbacks deliver big-ticket shine with low-effort upkeep — provided you plan your hot zones, measure for the real room you have, and seal well. When you’re ready to move from Pinterest board to install day, save yourself rework and go tailored with custom glass splashbacks — colour you love, cut the way your kitchen needs.





Write a comment ...